TL;DR
Arcade joystick and button wiring fails for three reasons, and only three. Those reasons are terminal width, mounting hole diameter, and supply voltage. Sanwa parts use 0.110″ (2.8 mm) terminals and a 30 mm hole. HAPP parts use 0.187″ (4.8 mm) terminals and a 28 mm hole. Illuminated buttons usually run on 12V DC, while game boards and encoders run on 5V. Check those three numbers before you order. Most compatibility problems then disappear. The rest of this guide shows you how to check them, and how to convert when the numbers do not match.
1. The Three Connector Standards, Compared
Every “will this fit?” question resolves to the table below. Read the terminal column first. That is where most orders go wrong.
| Family | Terminal width | Mounting hole | Switch type | Where it is standard |
|---|---|---|---|---|
| Sanwa (OBSF/OBSJ buttons, JLF/JLX sticks) | 0.110″ / 2.8 mm spade | 30 mm snap-in | Light touch, short travel | Japanese cabinets, fighting-game setups, multigame builds |
| HAPP / Suzo-Happ (Competition, Ultimate) | 0.187″ / 4.8 mm spade | 28 mm / 1-1/8″ | Heavier spring, longer travel | US cabinets, redemption and sports machines |
| Zippy (microswitch and joystick) | 0.187″ / 4.8 mm, 3-pin COM/NO/NC | Varies by model | General-purpose microswitch | Coin-op retrofits, budget builds |
| Generic illuminated button | 0.110″ or 0.187″, plus 2 LED wires | 24 mm or 30 mm | Microswitch plus separate LED circuit | Home builds, mall and FEC cabinets |
Why 2.8 mm and 4.8 mm Terminals Do Not Mix
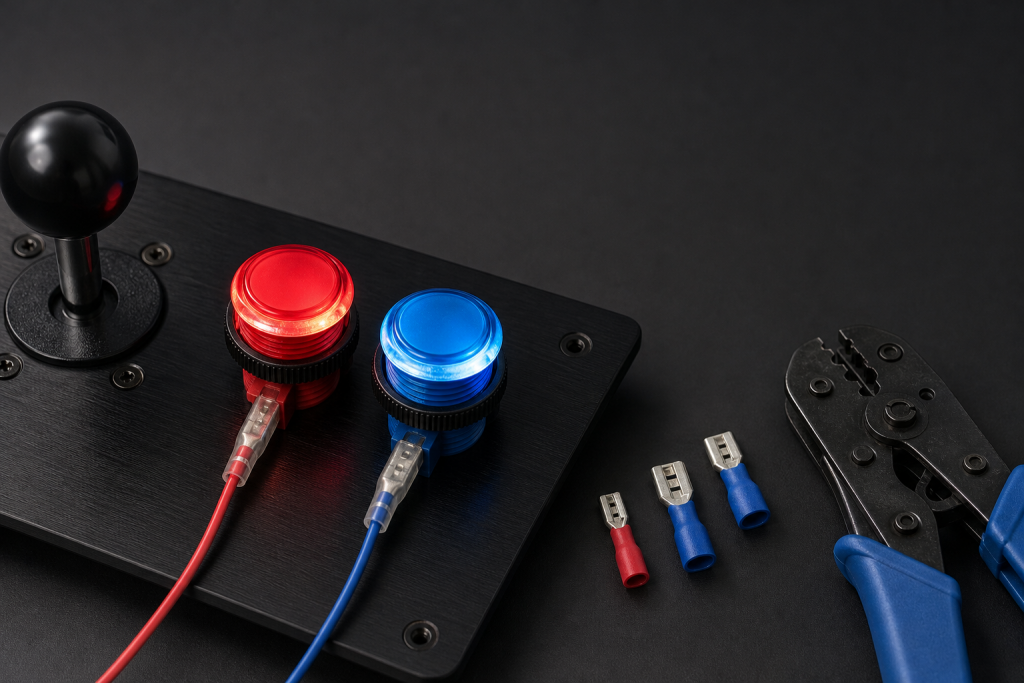
The single most common mistake is ordering 4.8 mm wire terminals for 2.8 mm Sanwa buttons. The connector will not grip the tab. It will not stay on under vibration either. It may feel tight when you push it on, which is why the fault shows up weeks later. BLEE stocks both widths, so check the SKU specification rather than the product photo. Arcade button terminals are a specification, not a guess. Terminal width decides whether arcade joystick and button wiring works at all.
5-Pin JST vs Spade Tabs on Joysticks
Joysticks add a second connector type, and it is easy to miss. Sanwa-style sticks often ship with a 5-pin JST NH joystick harness that plugs straight into the stick PCB. HAPP-style sticks expose individual 4.8 mm spade tabs instead. A 5-pin harness cannot be spliced onto spade tabs without cutting it. Plan for that before the machine is open, not after.
2. Mounting Holes and Panel Depth
Terminals are the visible problem. Hole size is the expensive one, because fixing it means drilling or replacing a panel.
30 mm vs 28 mm: Which Button Fits Which Hole
- A 30 mm hole fits Sanwa OBSF/OBSJ buttons and most imported LED buttons.
- A 28 mm (1-1/8″) hole fits HAPP Competition and Ultimate buttons.
- A 28 mm hole will not hold a 30 mm snap-in button. The retaining clips have nothing to bite.
- A 30 mm hole lets a 28 mm button spin and rattle.
If the panel already exists and the hole is wrong, fit an adapter ring instead of enlarging the hole. Enlarging is irreversible. An adapter is not.
Measuring Panel Thickness Before You Order
Measure two more things before ordering. First, the panel thickness. Second, the button depth behind the panel. A short-body button that suits a 3 mm steel panel will not seat in 15 mm MDF. A deep button body can also collide with the joystick bracket behind it. Both faults appear only at assembly, when the parts are already paid for.
3. Voltage and Current for Arcade Controls Wiring
Two separate circuits live inside a control panel. Mixing them is how LED buttons burn out. Treat arcade controls wiring as two systems, not one.
| Load | Typical supply | Notes |
|---|---|---|
| Game board / multigame PCB | 5V DC (12V on some boards) | Supplied by the JAMMA harness or the board adapter |
| Coin or bill acceptor | 12V DC | Separate lead from the power supply |
| Illuminated button LED | 12V DC (some 5V) | Check the label before connecting |
| USB encoder (PC builds) | 5V from USB | Never feed 12V into a USB encoder |
| JAMMA cabinet rail | +5V, +12V, −5V on older boards | Confirm the pinout on your harness |
How to Build the LED Power Budget
Budget the LED rail with one line of arithmetic:
Total current (A) = number of LEDs × current per LED (A)
Required supply (W) = total current × supply voltage
Worked example, using round assumption numbers: 16 illuminated buttons at 0.02 A each equals 0.32 A at 12V, or about 3.8 W. That is trivial for a 12V 2A adapter. This is why one adapter usually covers a whole panel. Substitute your own datasheet values, because the formula matters and these numbers do not.
Two Rules That Prevent Burnouts
- Never power LEDs from the 5V logic rail unless the LED is rated for 5V.
- Ground the LED circuit to the LED supply. Do not ground it to the board’s logic ground.
A 12V LED on a 5V rail stays dim. A 5V LED on a 12V rail fails within minutes. Neither fault looks like a wiring error at first.
4. Arcade Joystick and Button Wiring Compatibility Matrix
This matrix answers the practical question: does my host platform match my control parts? Read across the row for your platform.
| Host platform | Sanwa 30 mm / 2.8 mm | HAPP 28 mm / 4.8 mm | Zippy 4.8 mm | Illuminated 12V |
|---|---|---|---|---|
| JAMMA cabinet (56-pin edge) | Works, needs 2.8 mm crimps | Works, native | Works | Works, separate 12V lead |
| Pandora-style multigame board | Works, most common pairing | Works, needs 4.8 mm crimps | Works | Works, verify LED voltage |
| PC USB encoder (Zero Delay class) | Works, 2.8 mm crimps | Works, 4.8 mm crimps | Works | Works, 12V from PSU |
| Redemption or sports machine | Depends on panel hole | Native | Native | Usually pre-wired 12V |
The JAMMA Three-Button Limit
The standard JAMMA edge carries two players at three buttons each. Buttons 4 to 6 are not on the edge. They need a separate kick harness wired to the board’s auxiliary header. When a customer reports “buttons 4 and 5 do nothing”, this is the cause far more often than a failed switch. Check the harness before you replace the microswitch.
Reading the Matrix Correctly
“Works” means the part fits and functions, not that it fits out of the box. Most cells still need the correct crimp width. Arcade parts compatibility is a sum of small mechanical details, and one wrong detail stops the build.
5. Converting Between Standards
Conversion is mechanical work, not electrical work. New crimps and an adapter ring solve most cabinet wiring mismatches.
The Six-Step Conversion
- Count and identify. List every button and stick, with terminal width and hole size.
- Buy the right crimps. 2.8 mm and 4.8 mm female spade terminals, fully insulated, matched to your wire gauge.
- Crimp, do not solder, on spade tabs. Solder wicks up the tab and stiffens it. The tab then snaps off at the switch body.
- Keep one wire colour convention. Signal and ground must be distinguishable at a glance at 11 p.m.
- Test before closing the panel. Check continuity on each switch, then power the LED rail separately.
- Label the harness. An unlabelled 5-pin harness becomes a two-hour job for the next technician.
Crimping Rules That Prevent Callbacks
Use the correct die for the terminal width. Pull-test every crimp before it goes into the cabinet. A crimp that slides off under light finger pressure will fail under play. This single habit removes most field callbacks on control panel wiring.
6. Three Failure Modes Worth Memorising
Most service calls about arcade joystick and button wiring fall into three patterns.
| Symptom | Most likely cause | Fix |
|---|---|---|
| Button fires intermittently | Loose 4.8 mm terminal on a 2.8 mm tab | Re-crimp to the correct width |
| Button never fires | Kick harness missing, or switch unplugged | Check the path before replacing the switch |
| LED flickers or stays dim | LED wired to 5V logic instead of 12V | Move to the 12V rail, verify polarity |
Diagnosing a Dead Button in Order
Work backwards from the cheapest check. Test the switch with a continuity meter first. Then check the crimp. Then check the harness path. Replacing a microswitch before testing the path is the most common wasted part in arcade repair.
When the LED Is the Problem
LED faults look like switch faults from the player’s seat. A dead-looking button may still register perfectly. Test signal and light separately. That single step separates a wiring fault from a lighting fault in under a minute.
7. FAQ
Do Sanwa buttons fit HAPP holes?
No. Sanwa OBSF buttons need a 30 mm hole. HAPP Competition buttons need 28 mm (1-1/8″). A 30 mm button will not clip into a 28 mm hole, and a 28 mm button will rotate in a 30 mm hole. Fit an adapter ring if the panel is already drilled.
What size are Sanwa button terminals?
0.110″ (2.8 mm). This is narrower than the 0.187″ (4.8 mm) terminals used on HAPP and most US-style parts. Ordering 4.8 mm crimps for Sanwa buttons is the most common error in arcade joystick and button wiring.
Can I use a 5-pin Sanwa harness on a HAPP joystick?
Not directly. The 5-pin JST harness matches Sanwa-style stick PCBs. HAPP-style sticks expose individual 4.8 mm spade tabs. You must cut and re-crimp the harness, or replace it with a spade-type harness.
Are arcade LED buttons 12V or 5V?
Most are 12V DC, but 5V versions exist and look identical. Check the marking on the button body before connecting. A 12V LED on 5V stays dim. A 5V LED on 12V fails quickly.
How many buttons can one 12V adapter power?
Divide the adapter’s current rating by the per-LED current on the datasheet. A 12V 2A adapter covers a typical 16-button panel with wide margin, because LED draw sits in the tens of milliamps. Calculate it rather than assume it.
Why do buttons 4 and 5 not work on my JAMMA cabinet?
The standard JAMMA edge carries three buttons per player. Buttons 4 to 6 need a separate kick harness wired to the board’s auxiliary header. The switches are usually fine. The wiring path is missing.
Do Sanwa and HAPP buttons need different microswitches?
Switch bodies differ in size and terminal width even when the button footprint matches. Replace with the same family, or verify terminal width and actuator length against the original before substituting.
8. Bottom Line
Compatibility in arcade controls comes down to three numbers. They are 2.8 mm or 4.8 mm terminals, 30 mm or 28 mm holes, and 12V or 5V LEDs. Get them right when you order and installation takes an hour. Get them wrong and it becomes a panel rebuild.
Next Step
BLEE manufactures arcade buttons, joysticks, microswitches, JAMMA parts and power supplies in matched families. A single order therefore arrives with consistent terminal widths. If you are converting an existing cabinet, send a panel photo and a switch list. We will confirm the terminal and hole specification before shipment.
Related pages: Arcade Buttons · Sanwa Branded Buttons · Arcade Joysticks · Zippy Arcade Joysticks · Microswitches · Wire Terminals · Power Supply · JAMMA Parts · Pandora Game Board
References
- Himura Games, arcade button buyer’s guide. States Sanwa OBSF uses 0.110″ (2.8 mm) quick-connect terminals: https://himuragames.com/arcade-buttons/
- Shoryuken archive, Sanwa vs X-Arcade button teardown comparison: https://archive.supercombo.gg/t/sanwa-button-x-arcade-button/65620
- r/IconicArcadeGaming, measured note that HAPP upgrades need 4.8 mm wire connectors against 2.8 mm stock: https://www.reddit.com/r/IconicArcadeGaming/comments/1itn5w3/some_pictures_and_measurements_for_those_looking/